
Autoflower Grow Guide: The Complete Seed-to-Harvest Guide
The complete autoflower grow guide: week by week from germination to harvest - light, water, nutrients, training and harvest cues, all in one place.
By Autoflower.net Editorial Team · Last reviewed 2026-10-13
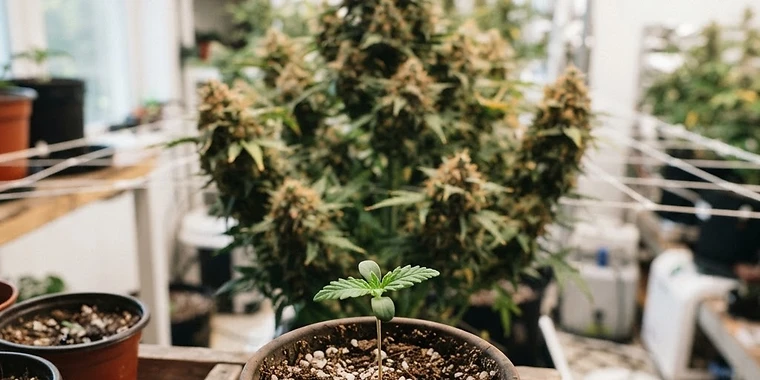
A healthy autoflower needs five things: strong consistent light, an airy medium in a 3 to 5 gallon pot, careful watering, light feeding and gentle hands in the first month. Do those well and most strains carry you from seed to harvest in 8 to 12 weeks. This guide is the week-by-week version - what the plant is doing, what it needs, and what can go wrong at every stage.
If you are brand new, start with the shorter how to grow autoflowers guide for the overview, then use this page as your working manual.
Before you start: the setup
- Light: a full-spectrum LED panel, 150 to 300 W for one or two plants. This is the single biggest yield factor; see the light schedule comparison.
- Pots: 3 to 5 gallon (11 to 19 L) fabric pots with drainage. Plant seeds directly in their final pot.
- Medium: light, well-aerated soil or a soil-coco-perlite blend. Heavy garden soil is unsuitable.
- Environment: stable 20 to 28°C, moderate humidity in veg (50-60 percent), drier in flower (40-50 percent), and airflow from a small fan.
- Monitoring: a pH kit or meter, and a 30x to 60x loupe for harvest checks.
That list is short on purpose. Autos do not reward complexity so much as consistency.
The autoflower week-by-week timeline
| Weeks | Stage | Plant's job | Your job | |---|---|---|---| | 0-1 | Germination & emergence | Crack, root, break soil | Moisture, warmth, patience | | 1-2 | Seedling | First true leaves, root run | Gentle watering, light close | | 2-4 | Vegetative | Build roots, leaves, branches | Start light feeding, LST window | | 3-5 | Pre-flower & stretch | First pistils, growth spurt | Switch to flower feed, stop training | | 5-8 | Flowering | Stack buds, build resin | P-K feed, support branches, lower humidity | | 8-12 | Ripening & harvest | Mature trichomes | Loupe checks, taper feed, harvest, dry |
The shape is the same for every auto; only the arithmetic shifts between fast 9-week strains and 11 to 12 week sativa-leaning ones. Mephisto Genetics' week-by-week guide describes a comparable arc from their breeding perspective.
Weeks 0-2: Germination and seedling
Germinate by your preferred method - our germination guide compares paper towel, soak and direct planting - and plant the cracked seed about 0.5 to 1 cm deep in its final pot.
The seedling phase is a test of restraint. Water a few millilitres at a time in a ring around the seedling and let the surface dry between drinks. Keep the LED close (30 to 45 cm) so the seedling does not stretch. Do not feed pre-fertilised soil; in plain medium, nothing or a quarter-strength dose around week 2 is plenty.
Problems at this stage: stretching (light too weak or far), seedlings that flop (overwatering), and yellowing true leaves (usually watering or pH, not hunger). Diagnose in our seedling problems guide and watering and pH guide.
Weeks 2-4: Vegetative growth
This is the auto's entire build phase, and it cannot be extended - which is why week 2 to 4 discipline decides the harvest.
- Feed: if in plain medium, climb from quarter strength toward half strength, watching leaf tips for burn. Full plan in the nutrient guide.
- Train: low-stress training works beautifully now. Bend the main stem sideways and tie it, opening lower branches to the light. Skip topping - recovery time is a tax autos cannot afford. Method details in the low-stress training guide.
- Watch pH: water at roughly 6.0 to 6.5 in soil (5.8 to 6.2 in coco). Lockout in week 3 shows up as deficiency in week 5.
Weeks 3-5: Pre-flower and the stretch
White pistils at the branch tips end the debate about whether the plant is flowering. A growth spurt follows. Your moves: switch feeding toward phosphorus and potassium, finish any training immediately, and start easing humidity down. Some growers notice slower strains flowering a week later; that is genetics, not a problem, as long as pistils appear by about week 6.
Weeks 5-8: Flowering
Bud sites multiply, then stack. Keep the flower feed going at moderate strength, keep air moving (a gentle fan over the canopy prevents stagnant pockets where mould starts), and support heavy branches with stakes before they snap. Defoliate sparingly - only leaves directly shading bud sites, and never more than a few at a time late in flower.
Autos' compact size means one crowded plant can shade itself badly; if you run several, space them so every bud site sees light.
Weeks 8-12: Ripening and harvest
From about week 8, check trichomes with a loupe every couple of days. Clear means wait, milky is peak-building, amber means the effect is shifting heavier. Mostly milky with a minority amber is the common target. Pistils darkening and curling inward corroborate the loupe. Our trichome guide covers the decision properly, and remember: breeder week counts run optimistically; see how long autos really take.
After harvest, the flower is not done: a 7 to 10 day dry at roughly 18 to 21°C and 55 to 60 percent RH, then a minimum two-week cure in jars, completes the job. Details in the drying room blueprint and curing guide.
The habit list (print-friendly)
- [ ] Final pot chosen, medium moist, light at correct distance before germination
- [ ] Water only by pot weight and finger test
- [ ] pH every watering
- [ ] Feed at quarter strength or less until pre-flower
- [ ] LST started by week 3, finished by week 5
- [ ] Flower feed from first pistils
- [ ] Branch support before buds get heavy
- [ ] Loupe checks from week 8, every 2 days
- [ ] Dry a week at 18-21°C and ~60% RH
- [ ] Cure 2+ weeks in burped jars
If something goes wrong
Most mid-grow problems are diagnosable in order: watering first, then pH, then nutrition, then environment. Our yellow leaves guide, nutrient deficiency guide, pest guide and fungal disease guide cover the common culprits - and the Plant Doctor tool will read a photo of your plant if you want a diagnosis rather than a reading list.
Growers' real harvests, in their own words and photos, live in the community journals - a useful reality check against breeder claims before you set expectations for your own first run.
Frequently asked questions
What is the best setup for growing autoflowers?+
A 3 to 5 gallon fabric pot of airy soil or soil-coco mix, a 150 to 300 W full-spectrum LED panel on an 18/6 schedule, gentle watering by pot weight, and a stable 20 to 28 degrees C room. One plant needs roughly 1 square metre of space.
When should I start feeding my autoflower?+
With pre-fertilised soil, often not until pre-flowering around week 4. With plain medium, start at one quarter of the recommended dose around week 2 to 3 and increase gradually. Underfeeding is much easier to correct than burn.
When should I start training my autoflower?+
Low-stress training can begin once the plant has 3 to 4 nodes, around week 2 to 3, and should finish by the start of the stretch in weeks 3 to 5. Avoid topping autos; the recovery time comes out of their short veg window.
How do I know my autoflower is ready to harvest?+
Check trichomes with a 30x to 60x loupe from about week 8. Mostly milky with a growing minority of amber trichomes is the common target; darkened, curling pistils support the same conclusion. Breeder week counts are only a guide.
Written by the Autoflower.net Editorial Team. Information on this page is educational and does not replace strain-specific breeder guidance. Laws on cannabis cultivation vary by jurisdiction — check your local rules before growing.