
Your Autoflower, Week by Week: The Complete Grow Timeline
A complete week-by-week autoflower grow timeline: what the plant is doing, what to feed, when to train, and when to stop.
Autoflowers trade flexibility for speed, so the growers who succeed are the ones who match their actions to the plant's actual stage. This week-by-week walkthrough shows what's happening under the soil, what the plant needs, and what you should do (and stop doing) at every step.
Week 1 — Germination and Seedling
What's happening: the seed cracks, a taproot searches down, and the first rounded cotyledons appear. Growth looks glacial; the roots are doing the real work.
Your job: plant 1 cm deep in a small pot or directly in the final one (preferable — autos hate transplanting). Keep the medium evenly moist, 20–25°C, and a gentle light at 20/4. Do not feed yet and do not overwater — damp, not soaked.
Week 2 — First True Leaves
What's happening: the first serrated leaves expand and the root mass builds. The clock is now ticking toward flower whether you're ready or not.
Your job: start feeding at ¼ strength, keep humidity 60–70%, and make sure light intensity is solid (250+ µmol/m²/s). No training this early — every leaf counts.
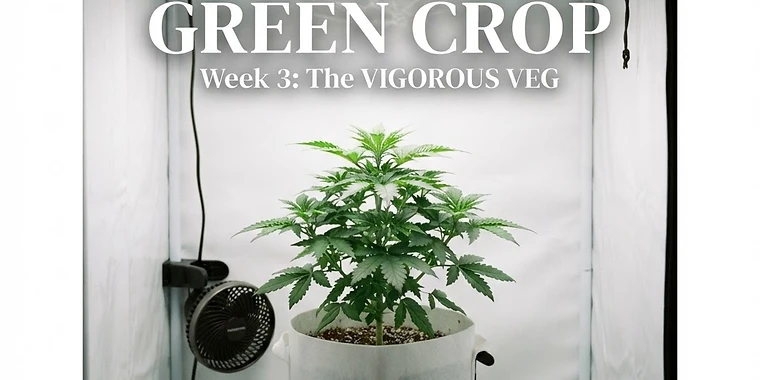
Week 3 — Fast Veg, Flower On the Horizon
What's happening: rapid growth, often 5+ new nodes. Many autos begin flowering at the end of week 3 regardless of light schedule.
Your job: this is the last window for low-stress training — bend the main stem sideways and tie it so the side branches level up. Step feeding up to ½ strength. If you're repotting at all (not recommended), it's now or never.
Week 4–5 — Flowering Begins
What's happening: pistils appear at every node; stretch starts, and the plant can double in height.
Your job: switch to bloom nutrients, ease humidity toward 50–55%, and stop all high-stress training. Support branches early — an auto's stretch is short but real. Raise your light if leaves show upward cupping.
Week 6–7 — Bud Building
What's happening: bud sites swell, trichome production begins, and the smell arrives. Stretch stops around week 6.
Your job: keep bloom feed steady (many autos tolerate a bit more PK now), maintain airflow through the dense canopy, and start scouting under magnification for early problems — bud rot, mites, and mildew all love this stage.
Week 8–9 — Ripening
What's happening: calyxes fatten, pistils darken and curl, and trichomes cloud up. Pre-flowers on lower branches mature last.
Your job: begin checking trichomes on the upper buds with a jeweller's loupe. Most milky with a few ambers = balanced effect. Flush or feed plain water in the final 1–2 weeks if that's your style — evidence either way is thin, so go with what your smoke test says.
Week 10–11 — Harvest and Drying
What's happening: the plant finishes from the top down.
Your job: harvest when trichomes suit your goal, trim, and dry at 18–20°C and 60% humidity for 7–14 days, then cure in sealed jars, burping daily for the first week. Patience here is worth more than any product you bought this cycle.
The Three Rules Behind the Timeline
- Autos don't wait. Fix problems the day you see them; there's no re-veg or extended veg to recover in.
- Feed by stage, not by habit. ¼ → ½ → bloom is most of the story.
- The drying room finishes the job. A perfect grow can be ruined by a hot, dry closet — climate control doesn't end at harvest.
Print this, stick it beside your tent, and adjust it to your specific cultivar — fast 8-week autos compress the middle stages, while big 12-week sativas stretch them.